-
E-mail
1771707726@qq.com
-
Phone
18031730272
-
Address
No. 186, Daguozhuang North Industrial Zone, Xian County, Cangzhou City
Product Categories
Pengyi Construction Instrument Factory, Xian County, Hebei Province
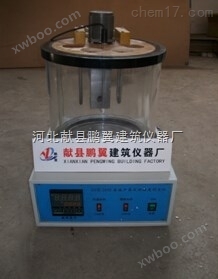
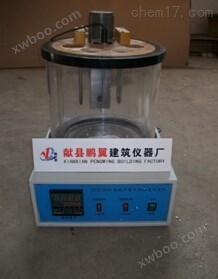
SYD-265E Petroleum Kinematic Viscosity Tester
NegotiableUpdate on 02/24
- Model
- Nature of the Manufacturer
- Producers
- Product Category
- Place of Origin
Overview
The SYD-265E petroleum kinematic viscosity tester is designed and manufactured according to the requirements specified in the industry standard T0619 "Asphalt kinematic viscosity test (capillary method)" of the People's Republic of China. It is used to measure the kinematic viscosity of asphalt samples at specified temperatures according to the requirements specified in T0619 standard. The experimental results of this instrument comply with the requirements of JTJ052 "Test Regulations for Asphalt Mixtures in Highway Engineering" of the People's Republic of China
Product Details
SYD-265E Petroleum Kinematic Viscosity TesterTechnical Specifications:
1Working power supply: AC220V ± 10%, 50Hz.
2Heating power of bath solution: two levels, 1000w (auxiliary heating) and 600w (temperature controlled heating)
3The temperature for using the bath solution is between room temperature and 150.0 ℃.
4Temperature control accuracy of water bath: ± 0.1 ℃.
5Mercury thermometer: with a division of 0.1 ℃ and a temperature measurement range of 100-150 ℃.
6Water bath capacity: 20L.
7Sample quantity: Simultaneously insert 4 capillary tubes.
8Mixing motor: power 6w; speed 1200r/min.
9Environmental temperature: -10 ℃~+35 ℃.
10Relative humidity:<85%.
11Temperature sensor: Industrial platinum resistance, with a division number of Pt100.
12Power consumption of the whole machine: not exceeding 1800W
13Capillary viscometer: A set of seven Kanfen counter current capillary viscometers, with models of 200, 300, 350, 400, 450, 500, and 600 (i.e. R tube inner diameters of 1.02, 1.26, 1.48, 188, 2.20, 3.10, and 4.00 millimeters, respectively)
SYD-265E Petroleum Kinematic Viscosity TesterCircuit principle:
The instrument consists of a capillary viscometer, mercury thermometer, electric stirring device, electric heating device, temperature controller, double-layer constant temperature bath, and lighting lamp. The structural diagram is shown in Figure 1, and the electrical schematic diagram is shown in Figure 2. The main features are:
1Double layer constant temperature bath: The inner layer adopts a hard glass cylinder with a diameter of 300 × 300mm, and the outer insulation sleeve is an organic glass cylinder with a diameter of 360 × 285mm. There is an air insulation layer between the inner and outer layers. During the test, in order to prevent water vapor from entering the insulation layer and affecting the observation, dry air can be filled into the insulation layer (the filling equipment is provided by oneself). There are four holes on the bathtub cover, which are used to place capillary viscometer clips and adhesive wood covers. There are three adjustment screws installed on the clamp to adjust the verticality of the capillary viscometer.
2The lighting adopts a 220V 16W2D fluorescent lamp, which provides a guarantee for clear observation of the readings of the capillary viscometer.
3Temperature controller:
⑴ Temperature sensor: Industrial platinum resistance, with a division number of Pt100.
⑵ Temperature controller: Intelligent temperature controller with PID self-tuning and four position dual LED window indication function, fast temperature control, fast response, small overshoot, and temperature control accuracy of ± 0.1 ℃.
⑶ Heating system: 1000W and 600W dual electric heating tubes for heating. At the beginning of the instrument's operation, 1000W auxiliary heating and 600W temperature controlled heating are used together to heat up quickly; Near the set observation temperature point, the heating power can be automatically adjusted, with 1000W auxiliary heating turned off and only 600W temperature controlled heating working to ensure stable bath temperature.
4. Mixing system: The electric mixer is a single-phase asynchronous motor. The electric shaft and mixing shaft are isolated by epoxy rods, which will not affect the normal operation of the motor.
Working conditions for instrument use:
1The instrument should be placed in a dry, clean, and non corrosive gas environment, and should be placed on a flat and stable experimental platform.
2Methyl silicone oil or glycerol solution should be placed in the constant temperature bath.
3When testing the sample, an appropriate capillary viscometer should be selected according to the requirements of the experiment.
On site installation:
1Open the packaging box, count the spare parts, pay attention to glassware, especially capillary viscometers, and handle them gently. Do not forcefully pull or plug them to avoid damage.
2Fasten the plumb ball on the hook of the rubber wood cover, adjust the bottom corner screw of the chassis to make the cylinder wall parallel to the vertical line.
3Insert the thermometer and sensor into the corresponding holes of the cylinder head.
4Connect the eight pin plug socket at the back of the chassis to the cylinder head, connect the three pin plug of the sensor to the three pin socket of the chassis, and connect the four pin power cord to the four pin aviation socket.
Usage:
Preparation before testing
1Before using this instrument, carefully read the user manual.
2Carefully read the industry standard T0619 "Asphalt Kinematic Viscosity Test (Capillary Method)" of the People's Republic of China, understand and familiarize yourself with the test methods, steps, and requirements outlined in the standard.
3Prepare various testing instruments, materials, etc. for testing according to the requirements specified in the standards.
4Check the working status of this instrument to ensure it meets the working environment and conditions specified in the manual.
5Check the casing of this instrument and ensure that the external power supply is in good working condition.
The second user sends:
1Turn on all switches on the control panel (switch indicator light on). At this point, the heating system (1000W, 600W) and stirring system begin to operate. Both display windows (PV, SV) of the XMT temperature controller have digital displays. The PV displays the bath temperature at this time (the value reflected by the temperature sensor), while the SV displays the set temperature.
2According to the experimental requirements, set the SV value (bath temperature). Press the "SET" function button in the lower left corner of the temperature controller panel with your hand, and the SV value will start flashing. Lock the set temperature by moving the down or up button in the lower right corner, and then press the "SET" button to complete the setting. The SV will display the set valueAfter pressing the "SET" button, the characters in the following menu will appear. Set the parameters according to the instructions. When the setting value is reached, the auxiliary heating system will be automatically cut off.
4After the bathtub temperature stabilizes, if there is a deviation between the thermometer reading and the temperature controller display value, it needs to be corrected. If the instrument display value is 100 ℃ and the glass thermometer detection value is 99.7 ℃, press the "SET" button to enter the B menu, and the PV window displays SC, making the SV value display -0.3 (if the glass thermometer detection value is 100.3 ℃, make the SV value display 0.3). After correction, press the "SET" button to exit the B menu. At this time, the displayed value is * the thermometer detection value, and the temperature deviation is corrected.
5When the instrument leaves the factory, the PID parameters have been set. If the temperature control accuracy does not meet the requirements, it needs to be reset again. Press and hold the function key "SET" for 5 seconds to enter the B menu, where the PV displays RL1. Then, every time you press "SET", the PV displays AL2, SC, ATU in sequence. Press the plus key to set ATU=1, the AT light is on, press and hold "SET" for 5 seconds, and exit the B menu. The system enters a self-tuning state, and after two cycles of fluctuation, the self-tuning ends, the AT light goes out, and the PID parameters are adjusted. (Pay attention to self-tuning)It needs to be done at a distance from the set point, and the auxiliary heating must be turned off
6After the temperature in the bathtub is correct and stable, the test can be carried out, and the sample should be tested strictly according to the method specified in T0619 standard.
Notes:
1The instrument does not have a separate mixing switch. When the temperature control switch is turned on, the mixer starts working simultaneously.
2The vertical state of the capillary viscometer can be adjusted by three small screws on the gripper.
3When installing the thermometer, make sure that the position of the mercury ball is close to the horizontal plane of the * point of the capillary viscometer.
4When the experimental environment changes or the bath liquid is replaced, it is necessary to recalibrate the PID parameters
5There are three fuses behind the chassis, and if any one of them is broken, the instrument will not work properly.
Xian County Pengyi Construction Instrument Factory is a professional manufacturer, researcher, and seller of testing instruments and equipment for the highway, railway, transportation, and construction industries. Pengyi Instrument "focuses on providing commonly used highway inspection instruments, construction instruments, and derivative products to meet the needs of quality supervision, scientific research institutions, universities, and various industry enterprises. The main products include more than 300 types of testing instruments and equipment in multiple series, such as geotechnical, aggregate, asphalt, concrete, road engineering, cement, waterproof materials, etc., of which more than 100 products are self-produced. The product has excellent material selection and reliable quality, making it an ideal choice for laboratory instruments.
Similar Product Recommend